failure analysis
Failure analysis is a systematic procedure for determining the cause of failure of technical components.
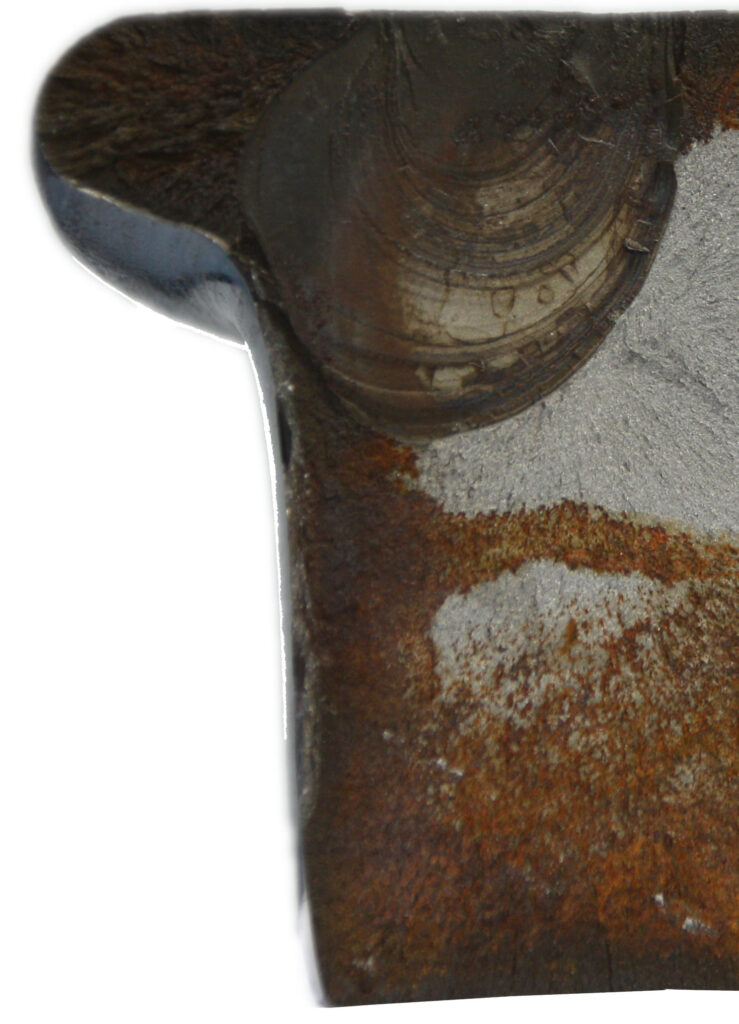
Damage prevention is derived from the knowledge gained. One example is the root cause analysis for the crack formation of stressed components during operation as a result of residual stresses, corrosion, notch effects, fretting, but also due to design or production-related influences and the choice of material.
Production-related influences such as heat treatments or forming processes can affect the technological properties, which is why the assessment of macro and microstructures also plays a major role.
DAMAGE ANALYSES FOR DAMAGE PREVENTION
Ideally, damage during the validation phase of a component makes you smart
Successful damage analysis requires a very good knowledge of design, materials science, strength and, above all, corrosion . This is an important prerequisite for drawing the right conclusions in the assessment for product optimization.
Every damaged part is an information carrier for our damage analyses. Damage from the field plays just as much a role as damage caused by component tests that were carried out until failure. These information carriers provide a lot of information about the damage event through a systematic approach and technical readout. This allows damage prevention measures to be derived in the form of product optimizations that ensure safe technical operation at a later date.
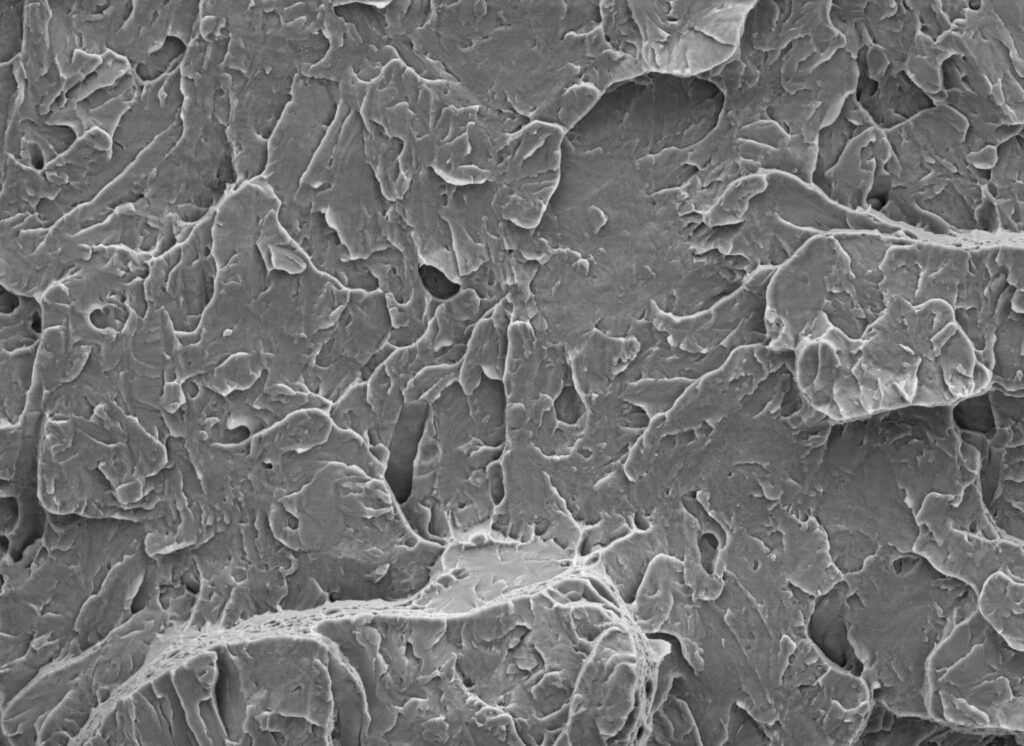
Many years of experience for a precise interpretation of the results on the basis of necessary analyses defined in the process provide the important benefit for the customer. This includes fractography and metallographic examinations as data reading instruments.
When selecting materials, important aspects such as corrosion behavior, weldability, high and low temperature behavior can be derived from the microstructure analyses.
OUR STRENGTHS IN THE FIELD OF DAMAGE ANALYSIS
Our core competencies are based on experienced specialists with many years of experience in damage analysis whose expertise is used for the interpretation of results and is therefore valuable for future damage prevention.
Quality assurance and optimization in validation, but also from series production, are important tasks in damage analysis
This includes a variety of different methods or competencies, which are defined depending on the application and result-dependent in the course of the investigation or applied to the customer order:
- Macro- and microfractography
- Microstructure analyses
- Analysis of corrosion damage from the field or after corrosion testing in our own laboratory
- On-site assessments
- Advice on loss prevention
TYPICAL APPLICATIONS FOR failure ANALYSis
- Independent expert opinions for courts, insurance companies, industry, SMEs, etc. in the event of damage incidents
- Assessments and condition assessments on site
- Material technology consulting in the validation phase or in series production following damage from the field
- Assessment of macro- and microstructures, influence of heat treatment, forming processes with regard to technological properties
- Assessment of corrosion mechanisms with regard to failure (static and dynamic in operation) (stress corrosion cracking, vibration corrosion cracking, etc.)
- Cause analyses for the formation of cracks in stressed components in operation due to residual stresses, corrosion, notch effect, fretting, design, production and material selection
Damage analysis for surfaces
Have you noticed a change to your product or has your customer complained to you about damage? We also offer you our expertise to carry out targeted damage analyses with solution-oriented advice.
It is therefore crucial to identify the causes of irregularities in a surface in order to make the right adjustments.
In addition to the analysis options in chemistry already described, metallographic skills and the corresponding analysis methods are also important for such a cause or damage analysis on the aluminum surface. These include, for example
- Surface / fracture surface analysis using REM
- Microstructural investigations on the ground joint
- Fracture surface examinations using stereomicroscopy
- Fractography with ultra-high-resolution FEG-SEM including state-of-the-art analysis options (EBSD, EDX, BSE, in-lens detector)
- Automated image analysis for quantitative evaluation of the microstructure
- Determination of the sealing quality
This makes it possible to determine the true causes of a deviation from the required quality. Whether it is your customer’s base material, your supplier’s chemical additives or actually your electroplating process that shows imperfections. We will find out.
failure AND PROBLEM ANALYSIS for packaging
We determine the cause of the failure, e.g. in the case of
- Out-of-specification (OOS) test results in stability tests
- optical irregularities caused by impurities in the manufacturing process or by the raw material
The aim is to identify leaks / faults and their cause as well as suggestions for rectification.
Case Study
X-ray inspection of the sealing seam of a high-barrier blister using contrast medium. Leaks are clearly visible even over large areas. The SEM images show the formation and quality of the sealing seam with very high resolution.
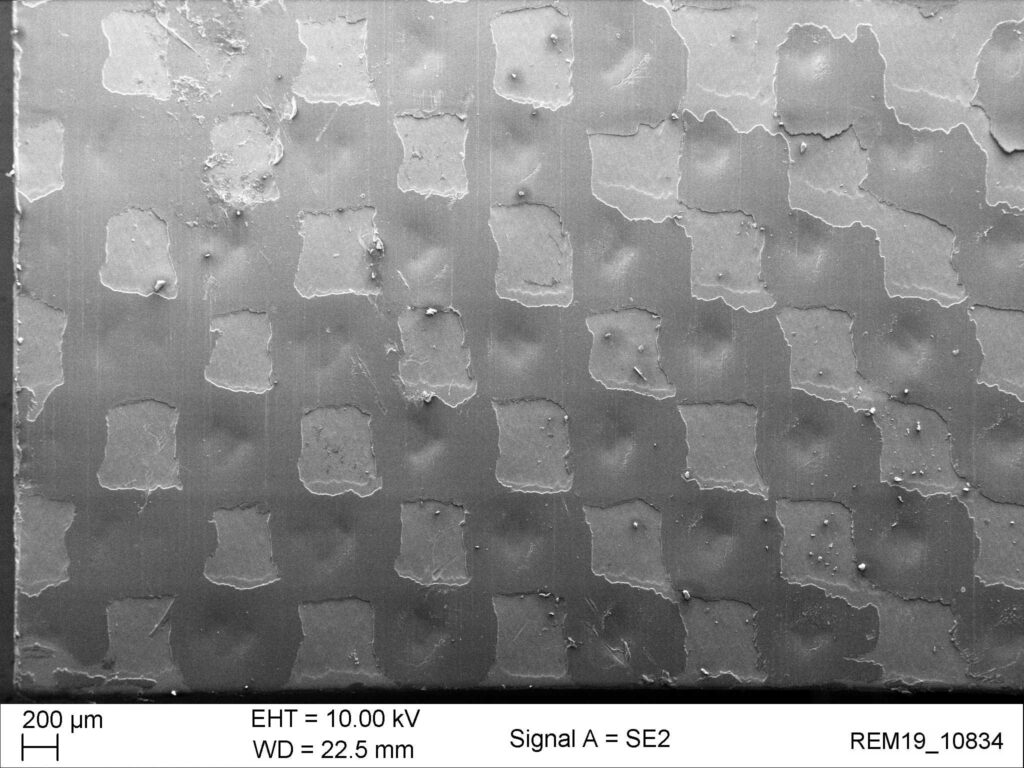
intact sealing
If the sealing seam is intact, the adhesive dots bond together to create a closed-cell sealing surface.
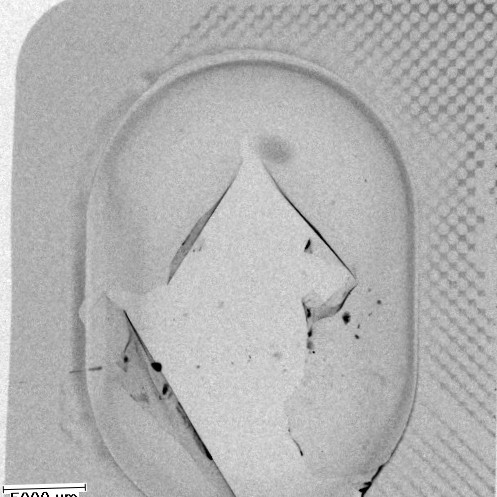
2D - CT scan with contrast medium
The dark areas in the X-ray image show microchannels in the sealing layer.
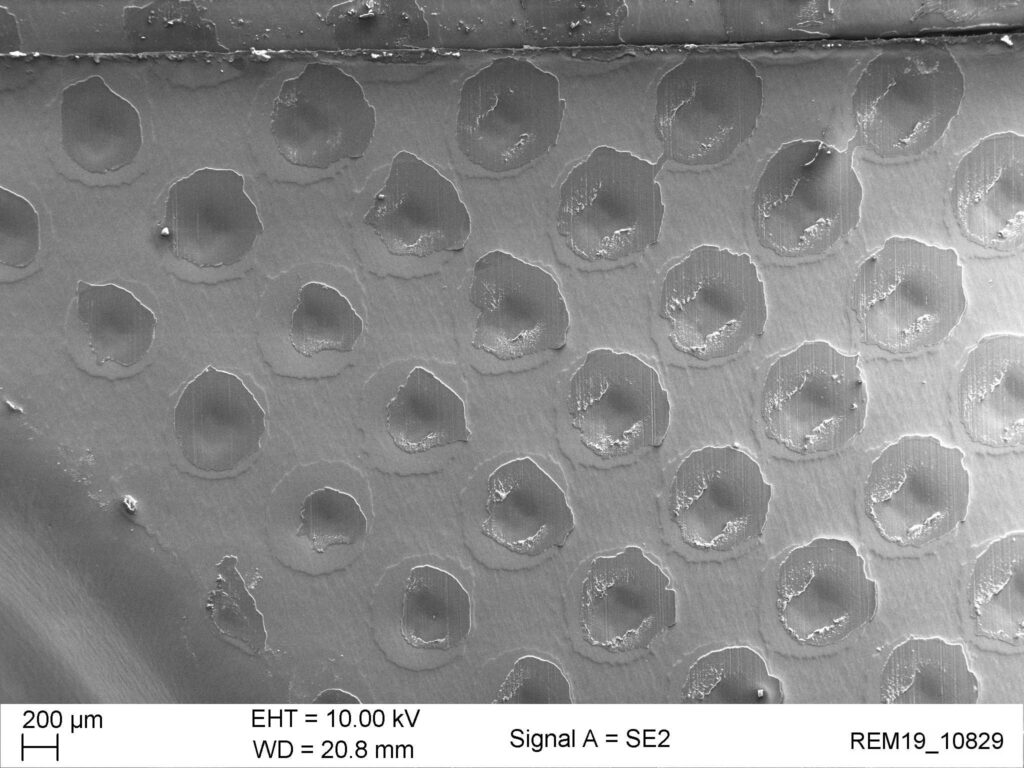
Faulty sealing
With this seal seam, the adhesive dots do not join, which is why the structure is open-pored.

